Ultrasonic Thickness Gauge

Welcome to Coltraco Ultrasonics’ range of Ultrasonic Thickness Gauges. 

We pride ourselves on the quality, reliability and accuracy of our ultrasonic testing instruments – all made in the UK. 

Our Ultrasonic Thickness Gauge ranges have been tested and calibrated according to BS EN 15317:2013 standards on a calibrated carbon steel block that is manufactured to EN ISO 2400:2012 and ISO 7963:2006 standards.

Our ultrasonic thickness gauge range are widely used in non-destructive testing and has an accuracy of +/- 0.1mm.

Our multi-echo ultrasonic thickness gauges are capable of ignoring paint layers up to 20mm thick making material thickness measuring straightforward.

The Portagauge® 5 is a multiple echo ultrasonic thickness gauge for measuring thicknesses of various metals and hard plastics, which ignores any coating up to 20mm in thickness.

P/N: 2099382-5

Why choose Coltraco Ultrasonics’ range of Ultrasonic Thickness Gauges

Accurate and reliable to meet BS EN 15317:2013 which is the standard for ultrasonic testing, characterisation and verification of ultrasonic thickness measuring equipment acting as the perfect additional quality assurance tool.

We strive to offer the highest quality digital thickness gauges, built with exceptional quality materials in the UK and remain competitively priced in the market worldwide through our unique R&D position. Designed to deliver accurate measurements on structural steel or pressure vessels.

Our multi-echo range is able to ignore paint coatings up to 20mm in thickness, giving you the material’s true thickness readings accurate to +/- 0.1mm. The perfect echo measuring principle helps to accurately measure a variety of surfaces.

On our latest innovation, the Portagauge® 5, we have included A-scan and oscilloscope trace functionality to assist your measurements, observing material condition and help verify correct return back wall echo to give you confidence that you are measuring the correct wall thickness providing accurate thickness measurements every time.

How to ensure material thickness complies with current standards

We have tried and tested a large number of different materials, including various metals and hard plastics, and have created a built-in database in our Portagauge® 5 containing speed of sound data of 12+ different materials pre-loaded in the unit for convenience which also includes an option to enter custom materials

For marine applications, it meets Classification Society requirements for marine thickness gauge measurement equipment and has an LCD backlight to allow working in dark, poor visibility spaces

Technical support and advice are available throughout the lifetime of the unit and we are here to help you with your application


Multi-Echo Ultrasonic Thickness Gauge Operating Principle and How an ultrasonic thickness gauge works

All sounds are physical vibrations which move through a material, and in the case of the sound we are used to, the vibrations move through the air.  Ultrasound is the same as the sound we experience, but its frequency is beyond that which humans are capable of hearing. Whilst the highest frequency a human can hear is around 20,000 Hz, all Portagauge® units use sound at a frequency of 2.25 MHz, 2.5 MHz or 5 MHz depending on the specific probe being used.

All Portagauge® devices use ultrasound to measure the thickness of a material.  The unit sends a strong electrical signal to the probe, causing it to emit a high-energy pulse of ultrasound. The transmitted ultrasound pulse travels through both the coating and the metal and reflects from the back wall. The reflected sound waves then reverberate within the metal, with only a small portion of the echo travelling back through the coating each time. The timing between the small echoes gives the timing of the echoes within the metal, which relate to the metal thickness. The returned echoes need not be consecutive as the thickness gauge will interpret them automatically and calculate the thickness. A minimum of three echoes are checked for each pulse that is sent into the metal in order to qualify as a multi-echo ultrasonic thickness gauge.


Types of Material measured by the Portagauge® range

The Portagauge® range is capable of measuring the thicknesses of various metals and hard plastics. There are different ultrasonic sensor options with different frequencies available to cope with different materials.

On the Portagauge® 5, there is a database containing speed of sound data of 12+ different materials pre-loaded in the unit for convenience. Example materials in the database are carbon steel, stainless steel 304, stainless steel 316, cast iron, ductile iron, copper, PVC, lead, nylon, polyethene, aluminium, asbestos and fibreglass. There is also an input for custom materials, to allow you to input test material not in the list.

If there is a particular material that you are looking to test but are unsure if our Portagauge® range can do it, please get in touch with us by submitting an enquiry.


Key Ultrasonic Thickness Measurement Considerations

We are aware that our customers are engaged in non-destructive testing using ultrasonic thickness gauges for measuring the thicknesses of materials in a variety of different conditions. We have developed a list of best practice recommendations, to ensure you have the knowledge required to take a successful measurement.

Please remove any surface debris that may interfere with the measurement

For poor-condition materials, typically badly corroded metals, please ensure the sufficient ultrasonic gel is applied on the surface of the material as this will ensure all air pockets between the sensor and material will be eliminated. Air pockets will affect the ultrasound signal, reducing the reliability of the measurements obtained

Please ensure sufficient pressure is applied to the sensor when performing the measurement

There is no requirement to remove the paint layer from the material when working with the Portagauge® 4 and Portagauge® 5 as the ultrasonic multi-echo technology will take into account the additional sound reflection and identify the correct return echo that represents the true wall thickness of the material


How does the Portagauge® range work to detect corrosion and material thickness?

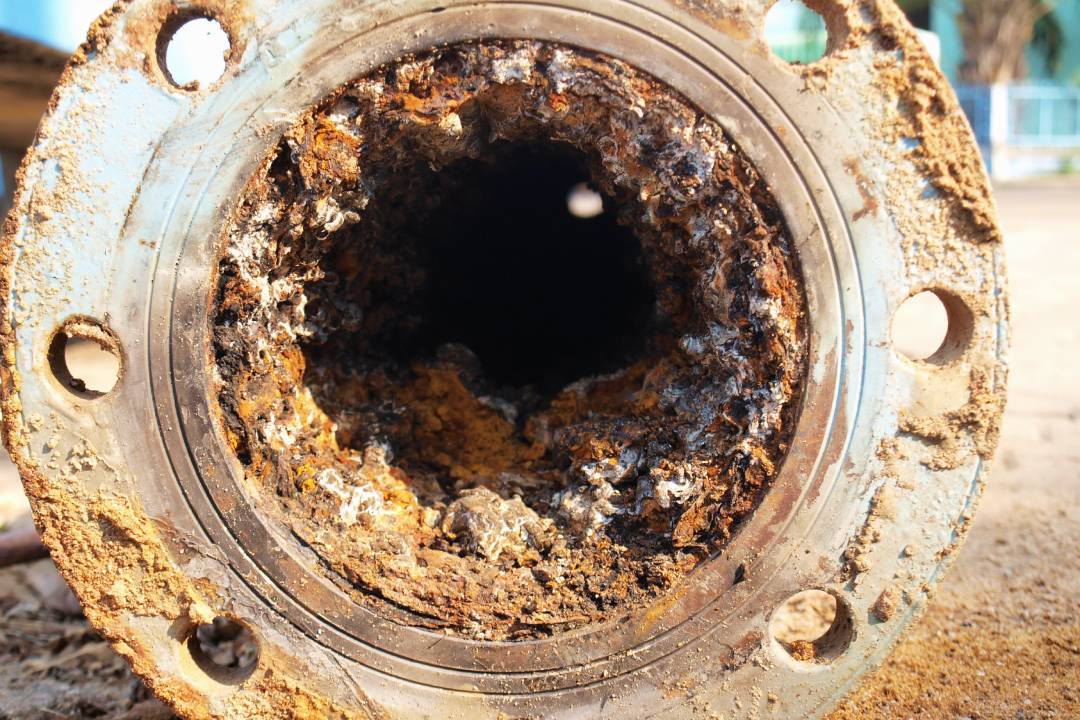
Our Portagauge® 3 and Portagauge® 5 use dual-element sensors which are commonly used for corrosion inspection work. They are highly sensitive to detecting corrosion in the form of pitting corrosion and just about any other forms of corrosion. Pitting corrosion in particular is a localised form of corrosion by which cavities are produced in the material and can be damaging to the material.

Dual element sensors contain two piezoelectric crystals, one acting as an ultrasonic transmitter and the other as an ultrasonic receiver. The dual element set-up gives the sensors an advantage over single-element sensors when dealing with irregular surfaces in highly corroded materials, due to the pseudo-focusing effect the ultrasound beams have. This allows the dual-element sensors to be more sensitive to echoes from the base of the pits of the corroded material, which represent the minimum remaining wall thickness. The reflected sound waves from the portion of the good material will give an indication of how badly the material has been corroded.

The wall thickness measurement that is displayed on the Portagauge® range represents the remaining wall thickness of the material that is in good condition. Comparing the wall thickness measurement from the Portagauge® to the actual wall thickness of the material when it was in brand-new condition allows the operator to determine the severity of the corrosion.


Advantages of a Multi-Echo Ultrasonic Thickness Gauge over a Single-Echo Ultrasonic Thickness Gauge

The Portagauge® 3 utilises the single-echo technology which detects the amount of time taken for a single echo of reflected sound to travel through the material and back to the sensor. The time it takes to travel through the material, along with the speed of sound of the material allows the device to calculate the wall thickness.

The Portagauge® 4 and Portagauge® 5 utilises multi-echo technology whereby the transmitted ultrasound pulse travels through both the coating and the metal and reflects from the back wall. The reflected sound waves reverberate within the material, and only a small portion of the echo travels back through the coating each time. The timing between the small echoes gives the timing of the echoes within the metal, which relate to the metal thickness. A minimum of three echoes are checked for each pulse that is sent into the material in order to qualify as multi-echo ultrasonic thickness gauging technology.

For the marine industry, various Classification Society standards require only multi-echo ultrasonic thickness gauges to be used. We recommend the Portagauge® 5 for such applications. Examples of such standards are found below:

IACS: Specific requirements from IACS Procedural Requirements PR No. 19 and No.77

DNVGL: DNVGL-CG-028 – Section 3 – Basic Requirements
Only multiple echo instruments may be used for TM onboard all ships

Do the Portagauge® range of ultrasonic thickness gauges work as paint depth gauges, a paint thickness gauge or a paint tester?

The Portagauge® range of ultrasonic thickness gauges measures the wall thicknesses of various metals and hard plastics. The multi-echo technology of the Portagauge® 4 and Portagauge® 5 is designed to ignore the paint coatings of the material, allowing the material’s true thickness to be measured. As a result, the Portagauge® range is not suitable to be used as paint depth gauge, a paint thickness gauge or a paint tester.


Ultrasonic Thickness Guage Frequently Asked Questions

What is an ultrasonic thickness gauge used for?

An ultrasonic thickness gauge is used to measure the thickness of various materials, such as metal, plastic, or glass. It is commonly employed in industries like manufacturing, construction, and maintenance to assess the integrity and corrosion levels of structures, pipes, tanks, and other components.

What is the accuracy of an ultrasonic thickness gauge?

The accuracy of an ultrasonic thickness gauge typically depends on the specific model and settings used. However, modern ultrasonic thickness gauges can provide high levels of accuracy, often ranging from ±0.1% to ±0.01% of the measured thickness.

What is the advantage of an ultrasonic level gauge?

The advantage of an ultrasonic level gauge is its non-contact measurement capability. It can accurately determine the level of liquids or solids in tanks or containers without requiring direct contact with the substance. Additionally, ultrasonic level gauges are often easy to install, offer real-time data, and are suitable for various applications and environments.

How does ultrasonic testing work?

Ultrasonic testing (UT) utilizes high-frequency sound waves to inspect materials for defects or measure thickness. A transducer emits ultrasonic waves into the material, and these waves reflect or echo back when encountering interfaces or flaws. By analyzing the reflected waves, defects can be detected, and thickness measurements can be obtained.

What is the principle of UTG (Ultrasonic Thickness Gauge)?

UTG works based on the principle of sound wave propagation. The gauge emits ultrasonic pulses into the material being tested, and the time taken for the sound waves to reflect back to the transducer is measured. By calculating the travel time and knowing the speed of sound in the material, the gauge determines the thickness accurately.

What is the maximum thickness for ultrasonic testing?

Ultrasonic testing can be used for a wide range of material thicknesses. There is no defined maximum thickness, as the technique can be applied to materials several meters thick. However, the effectiveness of the testing may depend on factors such as the equipment used, material properties, and the specific application.

What are the limitations of ultrasonic inspection?

Ultrasonic inspection has some limitations. It requires access to both sides of the material being tested, making it challenging for areas with limited accessibility. Additionally, certain materials with rough surfaces or complex geometries can affect the accuracy of measurements. Other factors like temperature, material composition, and operator skill can also impact the reliability of the inspection.

What is the best instrument to measure thickness?

The best instrument to measure thickness depends on the specific application and material being tested. Ultrasonic thickness gauges are widely used for their versatility, accuracy, and non-destructive nature. However, other techniques such as micrometers, calipers, or laser-based devices may be more suitable for certain situations.

Do ultrasonic sensors work in the dark?

Yes, ultrasonic sensors can work in the dark. They rely on sound waves rather than light waves to measure distance or detect objects, making them independent of lighting conditions. However, obstacles or certain environmental factors like excessive noise or acoustic absorption may affect their performance.

What is the minimum steel thickness for ultrasonic testing?

There is no specific minimum thickness for ultrasonic testing. In practice, the minimum thickness is often determined by the capabilities of the ultrasonic equipment being used. However, ultrasonic testing is generally more effective for measuring thicknesses greater than a few millimeters.

Why is ultrasonic better than radar?

Ultrasonic and radar technologies have different applications and advantages depending on the context. Ultrasonic is often preferred in situations where proximity sensing, accurate distance measurements, or thickness gauging of materials are required. Ultrasonic waves are highly directional and can provide precise measurements in confined spaces or for objects in close proximity. On the other hand, radar is more suitable for long-range detection, outdoor applications, and scenarios where the target objects may be moving or require a wide field of view. Each technology has its strengths and should be chosen based on specific requirements.

What can ultrasonic detect?

Ultrasonic waves can detect various characteristics depending on the application. In ultrasonic thickness gauging, they can measure the thickness of materials. In ultrasonic level gauging, they can detect the level of liquids or solids in tanks. Ultrasonic testing can also be used to detect and locate flaws, cracks, or voids within materials. Moreover, ultrasonic waves can be used for distance measurement, object detection, and imaging in medical ultrasound applications.

How fast can an ultrasonic sensor detect?

The speed at which an ultrasonic sensor can detect objects or measure distances depends on the specific sensor and its operating parameters. Generally, ultrasonic sensors can provide real-time measurements with response times typically ranging from a few milliseconds to a few hundred milliseconds. The actual detection speed also depends on factors such as the distance to the target, sensor sensitivity, and the processing capabilities of the connected system.

What frequency is used in ultrasonic testing?

Ultrasonic testing utilizes a range of frequencies depending on the application and material being tested. Common frequencies used in industrial ultrasonic testing systems range from 1 MHz to 20 MHz. Lower frequencies offer better penetration through thick materials but may have reduced resolution, while higher frequencies provide finer resolution but may have limited penetration depth. The appropriate frequency is chosen based on the specific requirements of the inspection task.

Does ultrasonic inspection work on any material?

Ultrasonic inspection is suitable for a wide range of materials, including metals (such as steel, aluminum, and titanium), plastics, composites, ceramics, and glass. However, the effectiveness of ultrasonic inspection can vary depending on the material’s acoustic properties. For instance, materials with rough surfaces, strong attenuation, or high sound velocity can pose challenges to obtaining accurate results. It is important to consider the material properties and select the appropriate ultrasonic technique and equipment for each specific material.

Can ultrasonic waves travel through metal?

Yes, ultrasonic waves can travel through metal. In fact, metals are often excellent conductors of ultrasonic waves due to their high density and stiffness. Ultrasonic waves can propagate through metals and provide valuable information about their internal structure, thickness, or the presence of defects. The velocity and behavior of ultrasonic waves in metals can be influenced by factors such as the material’s composition, grain structure, temperature, and the presence of coatings or surface conditions.

What are the three types of thickness gauges?

The three main types of thickness gauges commonly used are ultrasonic thickness gauges, magnetic thickness gauges (also known as magnetic induction gauges), and eddy current thickness gauges. Ultrasonic thickness gauges use sound waves, magnetic thickness gauges utilize magnetic fields, and eddy current thickness gauges employ electromagnetic induction. Each type has its advantages and limitations, and the choice depends on the material, surface condition, accuracy requirements, and specific application.

What is the most common thickness gauge?

Among the various thickness gauges available, ultrasonic thickness gauges are widely considered the most common and versatile. They are commonly used in a wide range of industries for thickness measurements due to their non-destructive nature, accuracy, and ability to measure a variety of materials. Ultrasonic thickness gauges can provide reliable and precise measurements, making them a popular choice for applications such as corrosion monitoring, quality control, and asset integrity assessments.